
How to Choose the Best Ferrule Crimping Tool in 2026?

Choosing the right Ferrule Crimping Tool in 2026 requires more than comparing prices or counting advertised features. A reliable tool should create a firm, even connection without damaging the ferrule or conductor. In practical use, small details matter. The handle should remain stable in one hand. The ratchet should release only after a complete crimp. The die must match the ferrule size and profile.

This guide examines the factors professionals and careful installers should check before buying. These include wire-range compatibility, crimp geometry, frame strength, jaw alignment, grip comfort, and quality control. It also considers tools for control cabinets, electrical panels, machinery wiring, and occasional workshop repairs. Clear manufacturer specifications matter, but they should not be accepted blindly. Samples, test crimps, and consistent pull checks can reveal problems that product photographs hide.

No tool is perfect. A compact model may feel comfortable, yet struggle with larger ferrules. A heavy-duty tool may last longer, but tire the user during repetitive work. I have found that convenience can sometimes disguise poor adjustment or uneven pressure. That weakness deserves attention. The best Ferrule Crimping Tool is not always the most expensive option. It is the one that delivers repeatable results, fits the intended wire sizes, and supports safe, careful workmanship. This 2026 buying guide will help readers compare practical performance, durability, and long-term value before making a confident decision.
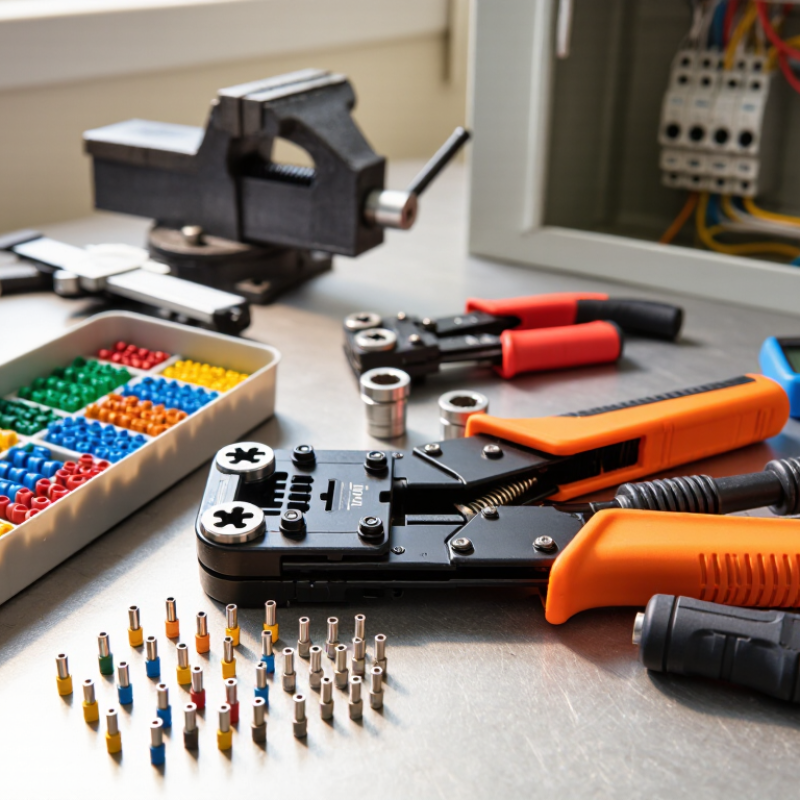
How to Choose the Best Ferrule Crimping Tool in 2026?

Define Application Needs by Wire Size, Terminal Type, and IEC 60228 Conductor Class

How to Choose the Best Ferrule Crimping Tool in 2026?

Selecting a ferrule crimping tool starts with the wire, not the handle. Check the conductor size, usually marked in square millimeters. A tool for 0.5 mm² wire may damage a 2.5 mm² ferrule. It may also leave a weak connection. Confirm the ferrule’s terminal type, including insulated, uninsulated, twin, or short-barrel designs. The crimp profile must match the terminal geometry.

IEC 60228 conductor class also affects tool selection. Class 1 solid conductors behave differently from Class 2 stranded conductors. Class 5 and Class 6 flexible conductors need careful compression. Their fine strands can spread during insertion.

I prefer tools with clear size ranges and repeatable ratcheting action. However, printed ranges are not enough. Test the actual wire and ferrule combination.

A practical check includes visual inspection, conductor insertion, and a gentle pull test. The ferrule should grip firmly without cutting through the sleeve. Keep the stripped length precise. Too much exposed copper looks untidy and may reduce insulation clearance. Too little wire can weaken the crimp.

I once trusted a smooth-looking connection that failed under vibration. That mistake changed my inspection routine. A perfect crimp is not proven by appearance alone.

Calibration records, clean dies, and consistent hand pressure matter.

Small details matter.

Match Ferrule Dimensions with DIN 46228-1/-4 and Available Tool Capacity

Choosing a ferrule crimping tool starts with the ferrule, not the handle. DIN 46228-1 covers tubular wire-end ferrules, while DIN 46228-4 generally includes ferrules with plastic collars. Check the conductor cross-section, sleeve length, and collar diameter before selecting a die. A 2.5 mm² ferrule is not automatically compatible with every 2.5 mm² tool setting.

Measure twice. Crimp once.

In practical assembly work, I compare the ferrule’s metal barrel with the tool’s stated capacity range. The range must cover both the conductor size and the ferrule construction. Some tools accept insulated and uninsulated ferrules, but their die shapes may differ. A square crimp, hexagonal crimp, or trapezoidal crimp can affect terminal entry and pull-out performance. Use the tool’s technical data, not only its printed scale. Markings can be surprisingly vague.

After crimping, inspect the conductor strands. They should remain inside the barrel, without exposed copper beyond the collar. The ferrule should hold firmly, but the insulation collar must not be crushed. A light pull test can reveal poor compression. For critical panels, a calibrated tensile test provides stronger evidence. I once trusted a familiar size marking and ignored the ferrule wall thickness. The connection looked acceptable, yet it fitted poorly in the terminal. That mistake changed my checking routine. Dimensions, die profile, and tool capacity must agree together. One measurement alone is not enough.

Compare Crimp Profiles Using DIN 46228 and IEC 60999-1 Requirements

Choosing a ferrule crimping tool in 2026 requires more than selecting a square or hexagonal profile. DIN 46228 defines requirements for wire-end ferrules, including dimensions, materials, and suitability for stranded conductors. It does not simply approve one universal crimp shape. A reliable tool should match the ferrule size range and produce consistent compression without cutting strands.

IEC 60999-1 focuses on the performance of connecting devices for copper conductors. Its test approach examines clamping reliability, mechanical strength, temperature behavior, and electrical continuity. Therefore, a ferrule profile should support stable contact inside the terminal, not only look symmetrical. A tidy crimp can still fail.

Professional testing data matters. IEC 60999-1 evaluates connections under mechanical and thermal stress, while DIN 46228-based testing checks ferrule construction and crimp quality. Industry wire-processing reports also show that automated inspection and documented process control are becoming more common in high-volume assembly. That trend is practical, not decorative.

In field work, I compare a finished ferrule under magnification. I check for split sleeves, exposed strands, uneven compression, and conductor movement. Then I perform a controlled pull test using the applicable specification. The correct profile depends on the terminal geometry. Square crimps often suit cage-clamp terminals, while hexagonal or trapezoidal forms may perform better elsewhere. This is where selection becomes less certain. The tool must be validated with the actual ferrule and terminal combination.

Evaluate Ratchet Force, Cycle Life, and Ergonomics for Daily Production

How to Choose the Best Ferrule Crimping Tool in 2026?

Daily production exposes weaknesses quickly. Ratchet force should close the terminal fully without excessive hand pressure. A higher setting is not automatically better. It may improve compression, but it can also increase fatigue during repetitive work. The U.S. Bureau of Labor Statistics reported that overexertion and bodily reaction caused 27.2% of private-industry days-away-from-work cases in 2023. That figure supports careful force evaluation. Test the tool with your most common ferrule sizes, using a force gauge when possible. Inspect crimp height, conductor retention, and release smoothness.

Cycle life matters just as much. Request documented testing conditions, including ferrule material, conductor size, and number of cycles. A large cycle figure means little without those details. IEC 60999-1 provides useful guidance for screw-type connection performance, but it does not replace application-specific crimp validation. Check whether the ratchet maintains its release point after extended use. Small changes can create inconsistent crimps. This is easy to overlook.

Tips: Hold the tool near the center of its handles. Keep the wrist straight. Compare five operators, not one. Record hand force, completed crimps per minute, and failed crimps. Rounded handles may feel comfortable initially, yet comfort can change after several hours. I would also question perfect laboratory results. Real benches include dust, rushed movements, and uneven wire preparation. Choose the tool that stays predictable there.

How to Choose the Best Ferrule Crimping Tool in 2026?

Evaluate ratchet force, cycle life, and ergonomics for daily production.

Ratchet force

Lower peak handle force reduces operator fatigue during repeated crimping.

Cycle life

Higher validated cycle life supports stable production and fewer tool replacements.

Ergonomics

The ergonomic score combines handle force, grip comfort, and repeated-use suitability.

The production-readiness index is weighted as follows: 40% cycle life, 35% ratchet-force efficiency, and 25% ergonomic suitability. Lower force values are better; higher index values are better.

Verify Pull-Out Strength, Insulation Quality, and Calibration Traceability

How to Choose the Best Ferrule Crimping Tool in 2026?

Verify Pull-Out Strength, Insulation Quality, and Calibration Traceability

A reliable ferrule crimping tool should produce a firm, repeatable connection. Do not judge it by appearance alone. A clean hex pattern can still hide weak compression. During evaluation, insert the ferrule into the specified conductor size. Then perform a controlled pull-out test with suitable equipment. Record the force, conductor condition, and crimp location. Repeated results matter more than one impressive sample.

Insulation quality deserves equal attention. The ferrule should grip the conductor without cutting strands or cracking its plastic collar. Check the entry point under bright light. Look for exposed copper, uneven sleeves, and crushed insulation. A smooth wire stop helps prevent inconsistent insertion depth. Small details matter. I once accepted a neat-looking crimp too quickly, then found loose strands beneath the collar. That mistake changed my inspection routine.

Calibration traceability separates a professional tool from an uncertain one. Ask for calibration records, reference standards, adjustment history, and the next verification date. The tool should also identify its rated wire ranges clearly. Storage conditions can affect performance, especially after heavy workshop use. In-house checks are useful, but they do not replace documented verification. My own process is not perfect; pull testing every connection is impractical. Still, scheduled sampling can reveal jaw wear before failures become routine. A tool with controlled force, clear markings, and traceable records supports safer, more consistent electrical assembly.

How to Choose the Best Ferrule Crimping Tool in 2026? - Verify Pull-Out Strength, Insulation Quality, and Calibration Traceability

Evaluation Dimension Recommended 2026 Benchmark Verification Method Weight Decision Result
Compatible conductor range Must cover the required ferrule sizes; a broad professional range is typically 0.14–10 mm². Check the tool marking, technical datasheet, and actual compatibility with the selected ferrule series. 15% Pass if all required sizes are covered
Ferrule standard compatibility Suitable for insulated or non-insulated wire-end ferrules manufactured to the applicable DIN 46228 requirements. Compare ferrule dimensions, conductor cross-section, sleeve length, and crimp profile with the tool specification. 10% Pass if profile and size match
Pull-out strength No single pull-out value applies to every ferrule size. Results must be compared at the same conductor size, ferrule type, conductor material, and test speed. Perform tensile testing on at least 10 samples per size; record minimum, average, and failure mode in newtons. 25% Select the tool with the strongest repeatable result
Crimp consistency Crimps should be fully formed, centered, and free from cracks, loose strands, excessive deformation, or conductor damage. Inspect 30 consecutive crimps across small, medium, and large ferrule sizes; measure crimp height where specified. 15% Pass with no visible defects
Insulation quality The ferrule sleeve must remain intact and securely attached; the crimp must not cut, split, or loosen the insulation. Use visual inspection and a retention check after crimping. If the tool is marketed for electrical safety work, verify the applicable insulated-tool rating separately. 15% Pass if sleeve and insulation remain undamaged
Calibration traceability A current calibration record should identify the tool serial number, measurement uncertainty, calibration date, due date, and traceability to national or international standards. Request a calibration certificate from an ISO/IEC 17025-accredited laboratory or an equivalent documented quality system. 10% Pass with complete traceable records
Calibration interval control Use a risk-based interval; annual verification is a practical starting point for frequently used production tools. Review usage frequency, overload history, failed inspections, and the organization’s documented calibration procedure. 5% Pass if interval is documented
Locking and release mechanism The tool should complete the crimp cycle reliably and prevent premature release when the design requires a controlled full cycle. Test the mechanism under repeated operation and confirm that incomplete crimps cannot be mistaken for completed crimps. 3% Pass if operation is repeatable
Ergonomics and maintenance Low hand force, clear size markings, corrosion-resistant surfaces, replaceable wear parts, and accessible cleaning instructions. Conduct an operator trial and review spare-part availability, lubrication requirements, and maintenance documentation. 2% Pass if suitable for planned workload
Selection rule: Choose the highest-scoring tool only after it passes pull-out testing, insulation inspection, and calibration-traceability review. Pull-out results are valid for comparison only when the conductor, ferrule, crimp profile, sample size, and test conditions are identical.
t