Ultimate Tips for Successful Stickers Printing Techniques?
In the thriving world of stickers printing, success hinges on mastering various techniques. According to Lisa Thompson, a leading expert in the industry, “Quality and creativity are the heartbeats of effective sticker designs.” This insight underscores the importance of both elements in attracting attention and driving sales.
Understanding the intricacies of stickers printing can be a daunting task. Many people overlook critical factors such as material choice and color selection. These decisions can significantly impact the final product's visual appeal and durability. It's essential to learn from mistakes made in past projects to refine your techniques and improve outcomes.
Moreover, the printing technology itself is evolving. Keeping up with the latest advancements can provide a competitive edge. However, many still rely on outdated equipment or techniques that may not yield the best results. Emphasizing innovation while reflecting on previous trials is crucial for any designer aiming for excellence in stickers printing.

Choosing the Right Sticker Material for Your Printing Needs
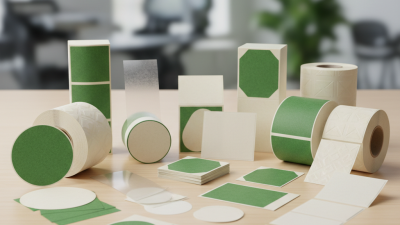
Choosing the right sticker material can make or break your printing project. Various materials exist, each with unique properties.
Vinyl is a popular choice for outdoor stickers due to its durability. It withstands water and sunlight well.
If you seek eco-friendliness, paper stickers may appeal to you. They are biodegradable but less resistant to elements.
Thickness matters. Thicker materials often provide a more premium feel. However, they can be more difficult to cut and apply. Some users may overlook this and end up with difficult stickers.
This can create frustration during application. Another potential issue is the adhesion quality. Some materials may not stick well to textured surfaces. Testing on different surfaces is essential to avoid disappointment.
Understanding your project's purpose is crucial. Will the stickers be placed indoors or outdoors? Will they be used on smooth surfaces or textured ones? Not considering these factors could lead to poor results.
Lastly, it’s wise to request samples before committing to a large print run. This practice may reveal unexpected issues with the material choice.
Experimentation is key in achieving the best results for your sticker printing needs.
Understanding the Different Printing Techniques for Stickers
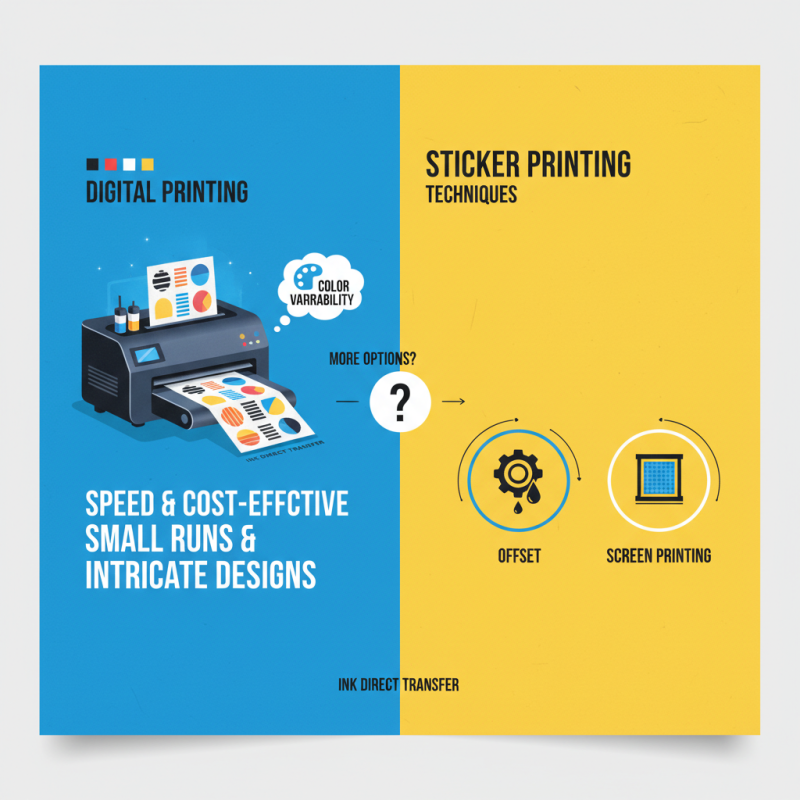
When exploring sticker printing techniques, several methods stand out. Digital printing is popular for its speed and cost-effectiveness. It's ideal for small runs and intricate designs. The machine transfers ink directly onto the sticker material. However, the colors may vary on different surfaces, which can be frustrating.
Flexography is another technique worth mentioning. It uses flexible relief plates and is suitable for larger volumes. This method provides great versatility for various materials. Yet, setting up flexography can be time-consuming and potentially lead to inconsistencies. This might result in variations across batches.
Screen printing offers a unique touch. It’s perfect for bold colors and durable stickers. Each color requires a separate screen, making the setup intensive. If misaligned, the final product can suffer. Some may find the process overly laborious for simple designs. Understanding these nuances is key to achieving the best results in sticker printing.
Optimizing Design for Effective Sticker Printing Outcomes
When designing stickers, clarity is key. Use bold colors and contrasting elements. Simple designs often stand out better. Think about the shapes.
Round stickers are welcoming, while rectangular shapes convey strength. Keep text brief and easy to read. A tiny font can lead to frustration.
Optimize your artwork for printing. Ensure high resolution, ideally 300 DPI. This prevents pixelation. Remember to include bleed areas. They help avoid white edges. Check your color model.
CMYK is standard for prints, unlike RGB used for screens. Misalignment here can ruin the outcome.
Don’t be afraid to seek feedback. Show drafts to peers. They may notice issues you missed. This step can improve your final product.
Experiment with different materials too. Vinyl and paper have distinct feels and effects. Each choice impacts how the design is received. Think through these details for better results.
Preparing Your Files for High-Quality Sticker Production
Preparing your files for high-quality sticker production is crucial for great results.
Statistics indicate that only 68% of designs meet the expected print quality on the first attempt.
This emphasizes the need for careful preparation. High-resolution images are key.
Aim for at least 300 DPI for your artwork. If your file is too low in resolution,
you risk blurry or pixelated stickers.
Color settings are another critical aspect. Use CMYK color mode for accurate color representation.
Approximately 20% of prints can suffer from color mismatches if files are set in RGB.
Pay attention to the bleed area as well. A common mistake is to overlook the 0.125-inch bleed
required for most printing services. This often leads to unintentional cropping during production.
Additionally, file types matter. PDF or TIFF files are preferred
for their compatibility with printing machines. Avoid using formats like JPEG, which can compromise quality.
Even experienced designers sometimes forget these details. Regularly reviewing your preparation process can help bridge this gap.
Understanding the standards of sticker printing can save time and resources in production.
Tips for Finishing and Laminating Stickers for Durability
When creating stickers, the finishing touches are vital to ensure they last. One popular method is lamination. Lamination involves applying a thin plastic film over the sticker. This not only enhances durability but also impacts the appearance. Matte and glossy laminates create different effects. Choose according to your design’s personality. Testing both options on samples can help you decide what works best.
Finishing options, like die-cutting, also play a crucial role. Die-cut stickers can capture attention with their unique shapes. However, edges can sometimes be rough or uneven. Paying attention to detail in cutting can improve the overall look. It’s worth experimenting with various cutting methods to see which achieves cleaner edges.
Waterproofing is another aspect to consider. Some stickers may require extra protection against moisture and fading. Applying an additional UV coating can help with this. Yet, it could alter the color vibrancy. Always test your stickers under different conditions before making a final decision. Small adjustments during the finishing phase can lead to significant improvements in quality.
Ultimate Tips for Successful Stickers Printing Techniques
| Tip Category |
Description |
| Material Selection |
Choose high-quality vinyl or paper that suits your sticker application needs. |
| Printing Method |
Utilize professional printing techniques like digital printing for vibrant colors. |
| Finishing Options |
Consider finishes like matte, gloss, or satin for different aesthetic effects. |
| Lamination |
Apply laminate to protect against scratches and prolong durability outdoors. |
| Die-Cutting |
Use die-cutting for custom shapes to make your stickers stand out. |
| Testing |
Run test prints to ensure color fidelity and material performance before a full run. |