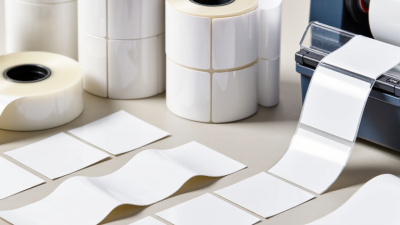
Choosing the right label starts with understanding its job, not its appearance. A label may identify a product, protect information, support branding, or survive harsh handling. Paper, film, thermal, clear, removable, wrap-around, and pressure-sensitive labels each perform differently. Their adhesive, finish, and printing method also affect the final result.
Mike Fairley, a respected label-industry consultant and author, has said, “A label is often the first product experience a customer receives.” That idea matters when businesses make labels for jars, boxes, bottles, clothing, or shipping cartons. A glossy label can attract attention under store lighting. A matte label can feel calmer and more premium. A freezer label needs adhesive that remains dependable on cold, damp surfaces. Small details matter.
This guide examines the top 10 label types and explains how to make labels with practical control. It covers material selection, artwork preparation, printing methods, cutting, finishing, and application. It also considers durability, readability, sustainability, and production cost. Even experienced teams make mistakes. A beautiful design may fail on a curved bottle. A strong adhesive may damage a reusable package. Some choices look efficient but create waste later. That is why testing matters before full production. A short trial run can reveal lifting corners, blurred text, or color shifts. The process is not perfect. It still becomes more reliable when every label is matched to its real environment.
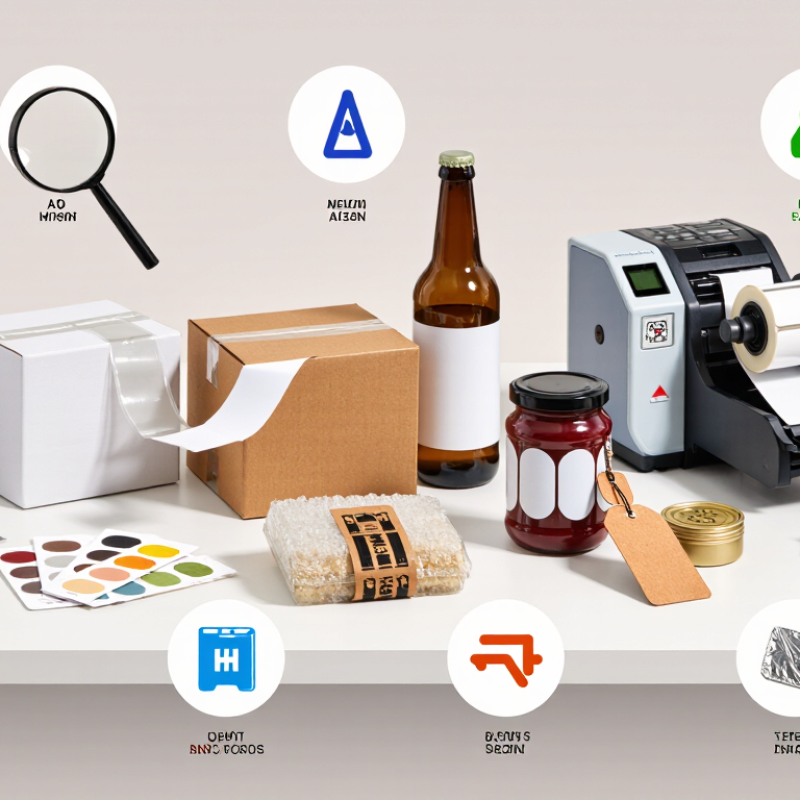
Labels are small information systems attached to products, packages, shelves, and equipment. They identify an item, explain its use, support traceability, and influence buying decisions. Common types include paper, film, pressure-sensitive, thermal, shrink-sleeve, in-mold, wet-glue, booklet, RFID, and security labels. Each type handles different surfaces, temperatures, moisture levels, and printing methods.
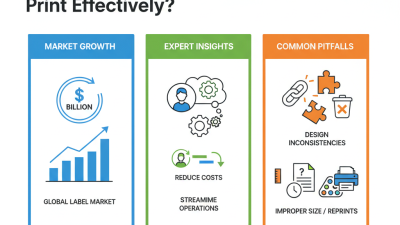
Choosing the right type prevents peeling, fading, scanning errors, and wasted material. Grand View Research valued the global labels market at about 48.82 billion US dollars in 2023. Its report also projects a 5.2% compound annual growth rate from 2024 to 2030. These figures show that labels are no longer simple decoration. They are part of packaging performance and product information. A label may look perfect on a screen, yet fail on a cold, curved container. I have learned that appearance alone is a weak quality test.
Tips: Start with the surface, exposure, and label purpose. Test adhesive samples on the real package for at least 48 hours. Check contrast, barcode readability, and small text at actual size. Use durable film for moisture or abrasion. Choose thermal materials only when storage conditions suit them. Keep required information clear, because more content is not always better. A practical test often reveals an overlooked problem.
Labels differ by purpose, stock, and printing process. Product labels identify jars, bottles, and boxes. Paper suits dry indoor goods, while synthetic film handles moisture and cold storage. Shipping labels use adhesive paper and thermal printing for quick, readable tracking details. Barcode labels need sharp contrast and verified scans. Direct thermal stock works for short-term parcels, but heat and sunlight can darken it.
Food labels combine product information with practical durability. Film or coated paper resists splashes, while flexographic printing supports larger production runs. Clear labels create a clean appearance on glass, though bubbles show easily during application. Kraft labels add natural texture and suit small-batch packaging. They can absorb ink, so a test print is essential. Warning labels use bold colors, durable film, and screen or digital printing for strong visibility.
Asset labels identify tools and equipment. Polyester stock with thermal-transfer printing often withstands rubbing and cleaning. Name badges usually use coated paper or plastic, with digital printing for short events. Tamper-evident labels reveal damage after removal, but adhesive performance depends on surface temperature and cleanliness. In real production, the first sample is rarely perfect. I check adhesion, scan distance, color, and edge lifting before approval. A label may look excellent on screen and fail on a dusty carton. Small tests prevent expensive rework.
Choosing the right label starts with the product’s surface, environment, and expected lifespan. Paper labels suit dry indoor goods and simple packaging. Clear labels create a clean appearance on glass or transparent containers. Waterproof labels protect information from splashes and humidity. Thermal labels work well for shipping, storage, and fast-changing data. Removable labels support temporary pricing or event information. Permanent labels resist peeling during long-term use. Tamper-evident labels show visible damage after opening. Metallic labels add a reflective finish for selected products. Fabric labels fit clothing and soft goods. Barcode or QR labels support tracking and product information.
A practical label begins with the right material and adhesive. Test the label on the actual surface, not only on a sample sheet. Rough cardboard needs stronger bonding than smooth glass. Curved containers may require flexible material and careful die-cutting. Choose ink that remains readable under light, friction, or moisture. A protective coating can improve durability, but it may reduce recyclability. I once focused too much on appearance and underestimated condensation. The label looked excellent at first. It failed during cold storage.
Tips: Match the adhesive to the surface temperature. Leave clear space around barcodes. Check small text at the final size. Test rubbing, water exposure, and removal force. Ask whether customers must read the label quickly. A beautiful label can still be impractical. Use a short trial run before ordering large quantities. Record the test conditions and results for consistent future production.
Designing label artwork begins with the finished package, not a blank screen. Measure the usable panel, curves, seams, and textured areas. A 3 mm bleed usually protects edges, but confirm the printer’s specification. Keep essential text inside a safe margin. Small type can disappear on rough stock. It does.
Build the file in CMYK unless production requires another color system. Save an editable copy before converting fonts to outlines. Use high-resolution images, preferably 300 dpi at final size. Create a separate dieline layer with a clear technical color. Do not place artwork on that layer. Check barcode contrast against the actual material. White or metallic substrates can change perceived color. A digital preview is not enough. Request a physical proof when color, tiny text, or alignment matters.
Before release, inspect spelling, net quantity, ingredients, contact details, and required regulatory marks. Use a checklist and a second reviewer. I once approved a file with a shifted icon; the error appeared only after trimming. That mistake changed my process. I now print the label at 100 percent and cut a paper mock-up. It reveals crowded corners quickly.
Export a press-ready PDF with embedded profiles and named layers where requested. Keep the source file, proof approval, and revision history together. Production teams need clarity, not clever formatting.
Label production starts long before ink reaches the press. Material selection depends on the product, surface, temperature, moisture, and expected handling. Paper suits many dry applications, while film performs better on curved or damp containers. Adhesive choice matters just as much. A strong adhesive can damage a surface, while a weak one may lift at the edges. Smithers’ The Future of Labels and Label Printing to 2028 estimates the global printed labels market at roughly US$50 billion in 2023, showing why small process decisions carry significant commercial weight.
In a typical workflow, operators confirm artwork, unwind the substrate, and control web tension before printing. Digital presses support short runs and variable information; flexographic presses remain efficient for larger volumes. Colour targets, barcode grades, and drying conditions should be checked during production, not only afterward. FINAT’s European Label Market Report 2024 reported a 2.1% decline in European self-adhesive labelstock demand during 2023. That pressure makes waste reduction practical, not decorative. Measure twice.
Converting may include die-cutting, lamination, slitting, and rewinding. Inspectors then examine registration, ink coverage, adhesive coating, dimensions, and barcode readability. Sampling alone can miss repeating defects, so camera inspection is useful on high-speed lines. In my experience, the first proof is rarely perfect; tiny bubbles often appear only after application. Small errors matter. A final inspection should record batch details, test results, rejected quantities, and corrective actions. ISO 12647 colour-control principles can support consistency, but they do not replace trained judgment. A clean-looking roll still deserves another check.
A practical comparison of common label types, materials, production methods, and quality-control requirements
| No. | Label Type | Typical Face Material | Printing Method | Adhesive or Attachment | Common Applications | Key Performance Needs | Main Production Steps |
|---|---|---|---|---|---|---|---|
| 1 | Paper Labels | Coated or uncoated paper | Flexographic, offset, digital, or thermal transfer | Pressure-sensitive adhesive or glue | Packaging, retail products, cartons, and identification | Good print quality and low-to-moderate moisture resistance | Select paper, print artwork, apply adhesive, laminate if required, die-cut, and inspect |
| 2 | Clear Film Labels | Transparent polypropylene or polyester film | Flexographic, digital, or screen printing | Clear pressure-sensitive adhesive | “No-label” packaging effects, bottles, jars, and cosmetic containers | Transparency, accurate registration, and resistance to water and oils | Prepare transparent film, print opaque or color layers, cure ink, apply adhesive, and die-cut |
| 3 | Thermal Transfer Labels | Paper, polypropylene, polyester, or synthetic film | Variable-data thermal transfer printing | Pressure-sensitive adhesive | Barcodes, shipping labels, inventory, and product identification | Scannable symbols, high contrast, and resistance to abrasion or chemicals when needed | Coat or purchase label stock, print variable data with a ribbon, verify codes, and rewind |
| 4 | Direct Thermal Labels | Heat-sensitive coated paper or synthetic material | Direct thermal printing without an ink ribbon | Pressure-sensitive adhesive | Receipts, short-term logistics labels, tickets, and temporary identification | Suitable sensitivity, readable barcodes, and protection from heat, light, and abrasion | Coat heat-sensitive stock, convert into rolls or sheets, test thermal response, and inspect |
| 5 | Security Labels | Destructible film, tamper-evident film, or specialized paper | Flexographic, screen, digital, or variable-data printing | High-tack adhesive or tamper-evident adhesive | Warranty seals, access control, asset protection, and product authentication | Evidence of removal, unique numbering, and resistance to replacement | Choose security substrate, add overt or covert features, print unique data, die-cut, and test removal behavior |
| 6 | Metallic Labels | Metallized film, aluminum foil, or metallic paper | Flexographic, offset, digital, or screen printing | Pressure-sensitive adhesive or glue | Premium packaging, decorative containers, and industrial marking | Reflective appearance, ink adhesion, dimensional stability, and scuff resistance | Select metallic stock, control ink opacity, print and cure layers, add coating if needed, and cut |
| 7 | Textile Labels | Woven polyester, printed fabric, cotton, or nylon | Weaving, screen printing, heat transfer, or digital textile printing | Sew-on, heat-seal, or fabric-compatible adhesive | Clothing care information, size identification, uniforms, and soft goods | Soft hand feel, wash resistance, color fastness, and comfortable edges | Prepare yarn or fabric, weave or print the design, finish edges, cut, fold if required, and test washing |
| 8 | In-Mold Labels | Polypropylene or compatible polymer film | Offset, flexographic, or gravure printing on film | No separate adhesive; label bonds during molding | Rigid containers, tubs, pails, and molded plastic packaging | Heat compatibility, accurate placement, strong integration, and scratch resistance | Print and dry film, cut label blanks, position them in the mold, inject or blow-mold, and inspect |
| 9 | Booklet Labels | Paper, synthetic paper, or film | Digital, flexographic, or offset printing | Pressure-sensitive adhesive with resealable construction | Instructions, ingredients, regulatory information, and multilingual packaging | Readable small text, precise folding, durable hinge, and reliable resealing | Print multiple pages, laminate or varnish, collate, fold, apply adhesive, die-cut, and check page order |
| 10 | Industrial Durable Labels | Polyester, polyimide, vinyl, or other engineered films | Thermal transfer, screen, digital, or laser marking | High-performance pressure-sensitive adhesive, rivets, or mechanical attachment | Equipment plates, electrical components, outdoor assets, and chemical containers | UV, temperature, moisture, abrasion, solvent, and chemical resistance | Specify environmental conditions, select engineered stock, print, protect the surface, cut, and perform durability tests |
| Step | Production Stage | Main Activities and Quality Checks |
|---|---|---|
| 1 | Material Selection | Match the face stock, liner, adhesive, and protective coating to the application surface, temperature, moisture, chemicals, and expected service life. |
| 2 | Artwork and Prepress | Check dimensions, color specifications, barcode quiet zones, fonts, bleed, die lines, variable data, and print direction before production. |
| 3 | Printing | Use the selected printing process and control ink coverage, registration, density, drying or curing, and print readability. |
| 4 | Finishing and Converting | Apply varnish or laminate when required, coat adhesive, laminate the liner, die-cut the label shape, remove waste, and slit or rewind the rolls. |
| 5 | Final Inspection | Verify dimensions, color, text, barcode readability, adhesion, die-cut accuracy, roll direction, core size, winding quality, and packaging condition. |